MCP Proxy
Aggregates all available MCP (Model Context Protocol) tools in the Chatspeed system into a unified proxy entry point, completely solving the pain point of repeatedly configuring tools across different IDEs.
The MCP Proxy, a core feature of Chatspeed's ccproxy module, solves the problem of fragmented MCP management. It aggregates all MCP tools installed in Chatspeed into a flattened structure and provides a unified access entry point via the SSE protocol. This means you only need to install your MCP tools once in Chatspeed, and then you can access all of them from any IDE via http://localhost:11434/sse.
🔧 Why You Need an MCP Proxy
Developers often use multiple AI IDEs or plugins, and each typically requires the installation of common MCPs to extend the AI's capabilities. Certain MCPs, like context7 or search MCPs, are installed in almost every IDE. Reinstalling these necessary MCPs every time you switch IDEs becomes tedious.
Before Using the ccproxy Module's MCP Proxy
- Individually install MCP tools in VS Code ❌
- Repeatedly configure the same tools in Cursor ❌
- Duplicate setup for Claude Code ❌
- Duplicate setup for Gemini CLI ❌
- Repeatedly install the same MCP tools for Trae, Cline, Roo Code, etc. ❌
After Using the ccproxy Module's MCP Proxy
- Simply install all necessary MCP tools on Chatspeed ✅
- The ccproxy module provides all aggregated MCP tools via
http://localhost:11434/sse✅ - Configuring MCPs in any IDE or plugin is simple: just select the SSE protocol and set the URL to
http://localhost:11434/sse✅ - Adding, removing, or modifying tools is managed centrally in the Chatspeed client ✅
🌐 Chatspeed's MCP Proxy Architecture
🛠️ Server-side Installation and Configuration
Installation
Please download and install the latest version of Chatspeed from the official Chatspeed website.
MCP Proxy Configuration
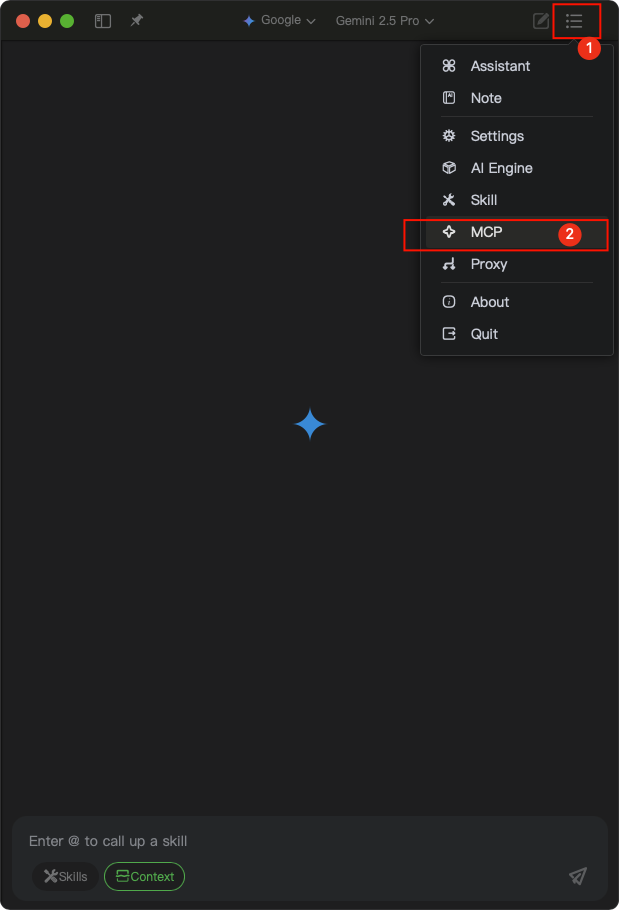
Open the MCP configuration options from the "MCP" menu in the top-right corner of the Chatspeed main interface. Click in the numerical order indicated in the image:
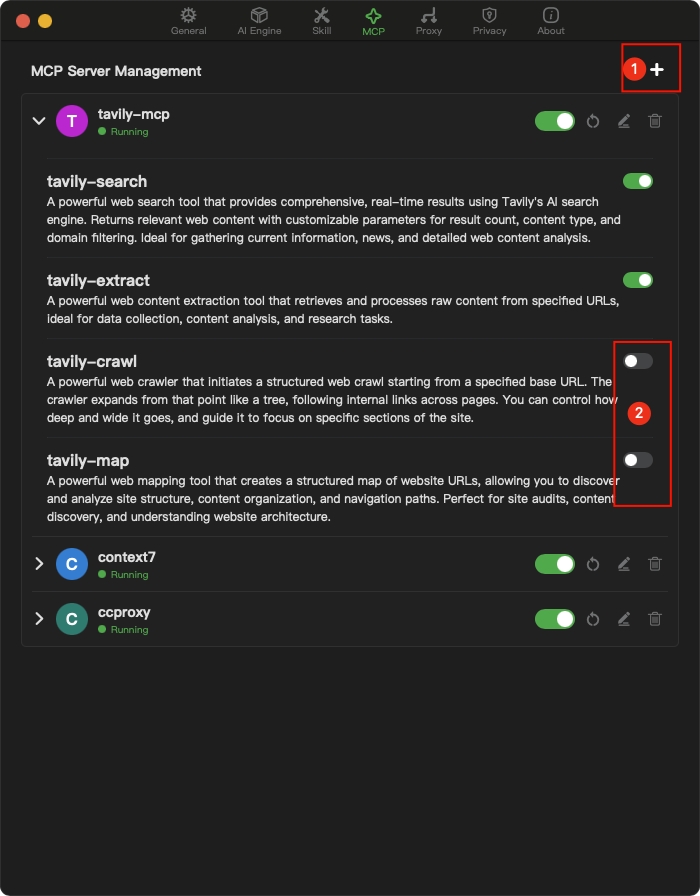
In the MCP configuration interface, add the necessary MCP tools, such as context7, tavily-mcp, etc. You can remove any tools you don't need (as indicated by the number 2 in the image below).
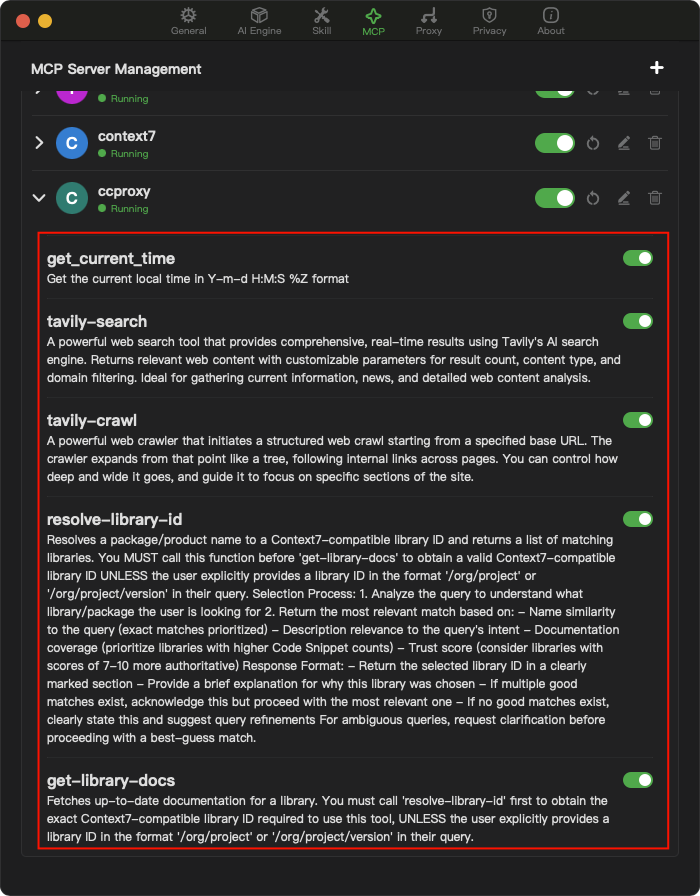
After the configuration above, you will have the following MCP tools:
⚙️ MCP Client Configuration
General Configuration
The configuration format for different MCP clients may vary slightly, but it generally looks like this:
{"mcpServers":{"ccproxy":{"type":"sse","url":"http://localhost:11434/sse"}}}Please note that this chapter's MCP URL examples use the default port of
ccproxy. If you've modified the default port, please update the port configuration in your settings file accordingly.
Claude Code
The following command installs it at the user scope, making it available for all projects:
claude mcp add-t sse -s user ccproxy http://localhost:11434/sseAfter installation, you can see the following configuration information:
> claude mcp get ccproxyccproxy: Scope: User config (available in all your projects) Status: ✓ Connected Type: sse URL: http://localhost:11434/sseIf you only want to install it for the current project, use the following command:
claude mcp add-t sse ccproxy http://localhost:11434/sseGemini CLI
Gemini CLI uses the mcpServers configuration in the settings.json file to locate and connect to MCP servers. This configuration supports multiple servers with different transport mechanisms.
You can configure MCP servers in the global ~/.gemini/settings.json file or at the root of your project by creating or opening a .gemini/settings.json file. In that file, add the mcpServers configuration block.
{"mcpServers":{"ccproxy":{"url":"http://localhost:11434/sse"}}}Once configured, enter the Gemini CLI and execute /mcp list to see the list of available tools. Here is an example:
╭───────────────╮│ > /mcp list │╰───────────────╯ℹ Configured MCP servers: 🟢 ccproxy - Ready (5 tools) Tools: - get_current_time - get-library-docs - resolve-library-id - tavily-extract - tavily-searchFor more configuration information, you can follow this guide.
VS Code
You can follow the MCP installation guide using the standard configuration above. Alternatively, you can use the VS Code CLI to install the ccproxy MCP tool:
code --add-mcp '{"name":"ccproxy","url":"http://localhost:11434/sse"}'Cursor
Go to Cursor Settings -> Tools & Integrations -> MCP Tools -> Add new MCP Server. Add the following information to the configuration file:
{"mcpServers":{"ccproxy":{"url":"http://localhost:11434/sse"}}}Trae CN
Go to Trae CN's AI Function Management -> MCP -> Add -> Add Manually. Add the following information to the configuration file and save:
{"mcpServers":{"ccproxy":{"url":"http://localhost:11434/sse"}}}Windsurf
Windsurf's MCP server configuration file is located at ~/.codeium/windsurf/mcp_config.json. This is a JSON file that contains a list of servers Cascade can connect to. The JSON should follow the same pattern as the Claude Desktop configuration file.
You can open ~/.codeium/windsurf/mcp_config.json and add the following content:
{"mcpServers":{"ccproxy":{"serverUrl":"http://localhost:11434/sse"}}}Note, if you have multiple MCP tools, just add the
ccproxysection, like so:
"ccproxy":{"url":"http://localhost:11434/sse"}Cline
- Click the button marked with number 1 to enter the MCP setting interface, then click the button marked with number 2 to switch to the "Installed" interface. Finally, click the button marked with number 3 to enter the MCP code configuration interface. Copy the code below into the code editor and save:
{"mcpServers":{"ccproxy":{"serverUrl":"http://localhost:11434/sse"}}}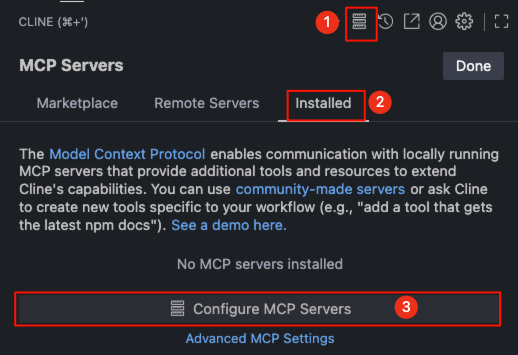
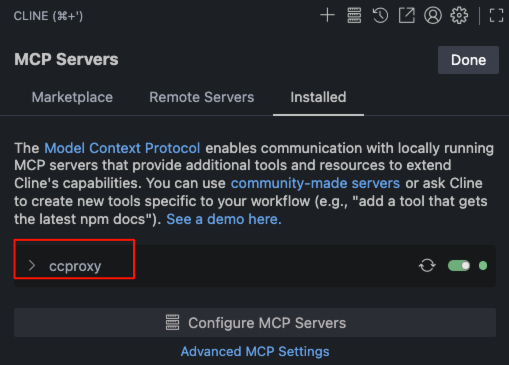
- After saving the code, you will see the
ccproxyMCP tools in Cline's MCP server list.
Roo Code
- Click the button marked with number 1.
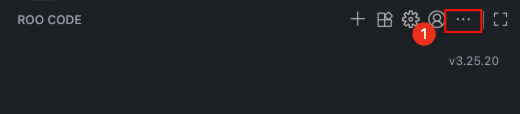
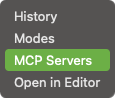
- Select "MCP Servers" from the drop-down menu.
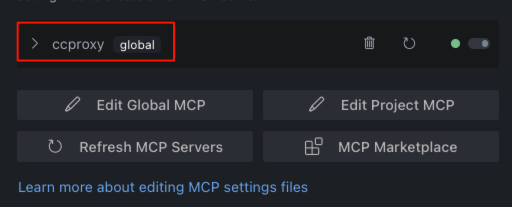
- You can click the button marked with number 1 to add a global MCP or click the button marked with number 2 to add a project-level MCP.

- Add the following content to the code editor that opens and save:
{"mcpServers":{"ccproxy":{"serverUrl":"http://localhost:11434/sse"}}}- Now you can see the
ccproxyMCP tools in theRoo CodeMCP server list.